Jira & Jira Cloud
Team Business EnterpriseUsers with administrative privileges can find this integration below the list of personal alert integrations on the Alerts & Integrations tab of the Project Settings page.
We currently have two different service integrations for Jira. Both versions provide the same features, but differ in the way they authenticate requests.
Which integration to choose?
Section titled “Which integration to choose?”If you are running a Jira Server, then the original Jira Integration is your only option. You may also use this integration for Jira Cloud, but we don’t recommend it as it uses Basic Authentication which requires storing credentials to make a API request.
If you are using Jira Cloud, then we highly recommend the newer Jira Cloud integration as this uses OAuth and only requires us to keep a token for authentication.
1. Select the Jira integration
Section titled “1. Select the Jira integration”
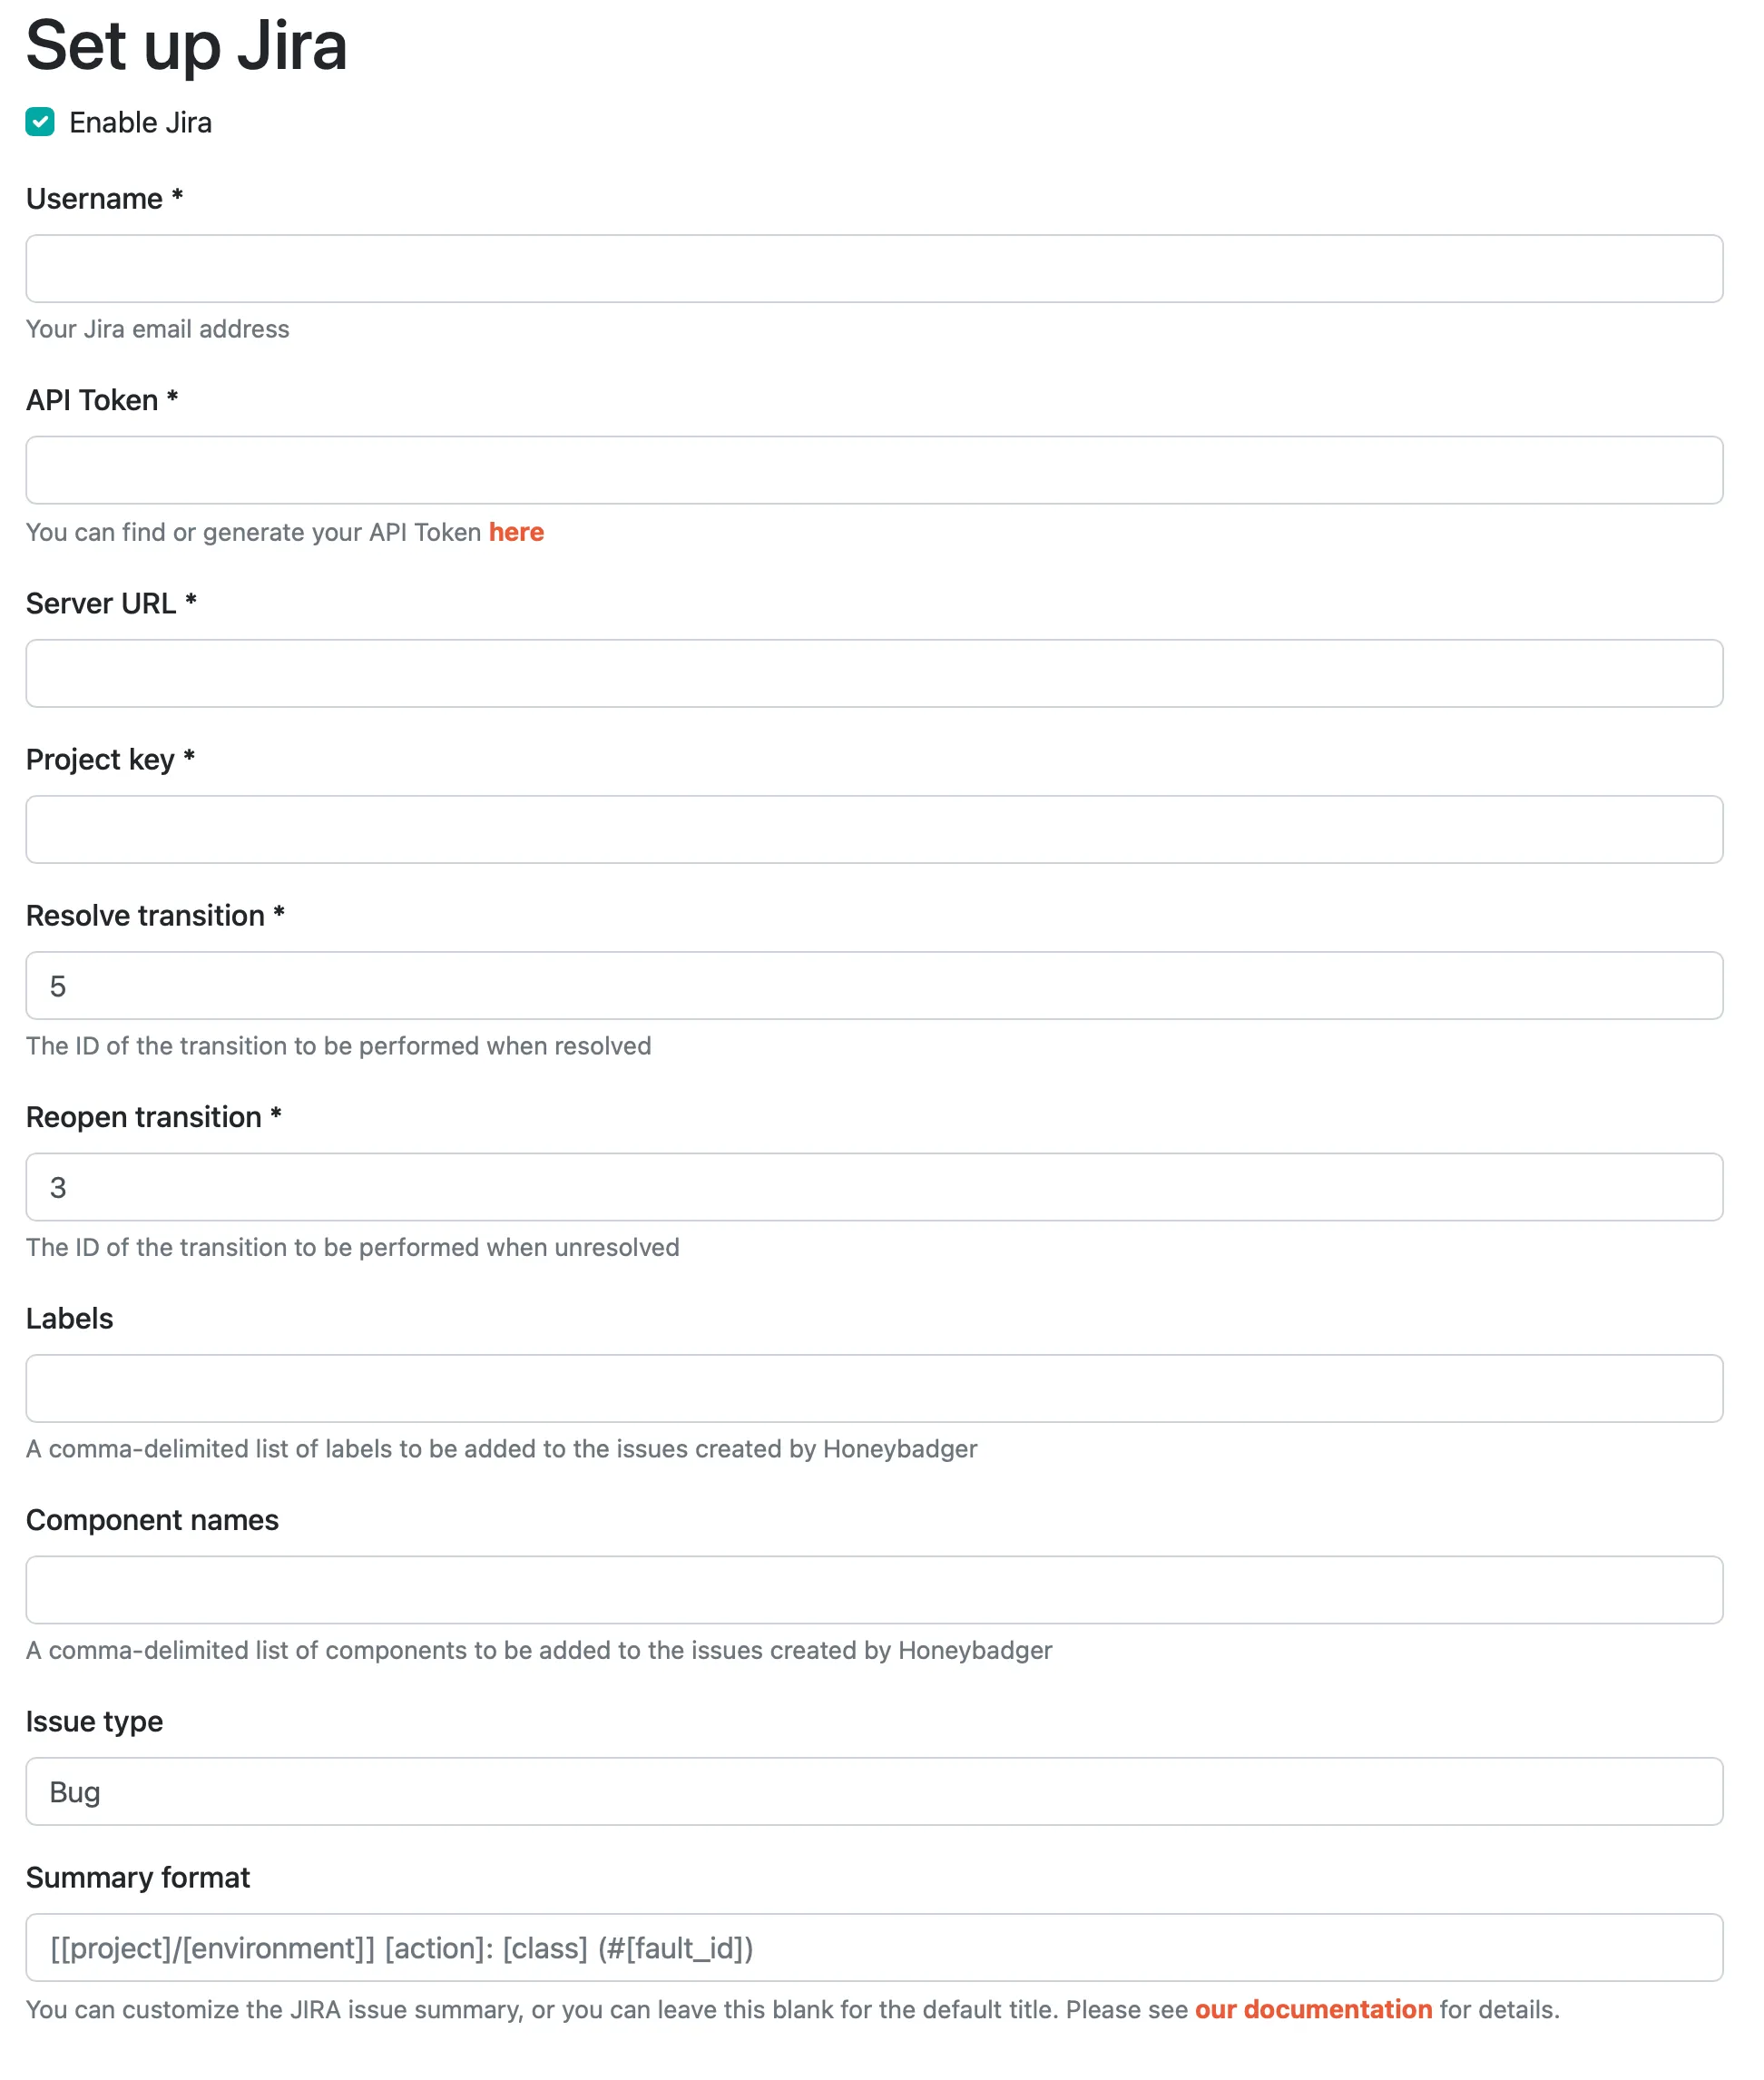
2. Configure
Section titled “2. Configure”Here’s an overview of the options:
- The username and password will be your login for Jira.
- The server url is the subdomain of your Jira instance, such as “https://hb4lyfe.atlassin.net”. Don’t forget the “https://”.
- The project key was setup when you created the project. It can be found (on Jira) from Project Overview > Administration > Edit Project.
- The transition ID’s can be set in your workflows on Jira when viewed in text mode. ID’s are unique, so make sure there are no conflicting values.
- Send a detailed issue description controls how much fault data is included in new issues. By default, Honeybadger sends a short backtrace excerpt and a link back to the fault in Honeybadger. Enable this option to instead send a detailed Jira-wiki description that includes context, parameters, and the backtrace. Note that enabling this sends more potentially sensitive fault data to Jira.
3. Save
Section titled “3. Save”That’s it! You can test the integration by clicking “Test”. Otherwise, just save it and you’re ready to go.
Jira Cloud
Section titled “Jira Cloud”1. Select the Jira Cloud integration
Section titled “1. Select the Jira Cloud integration”
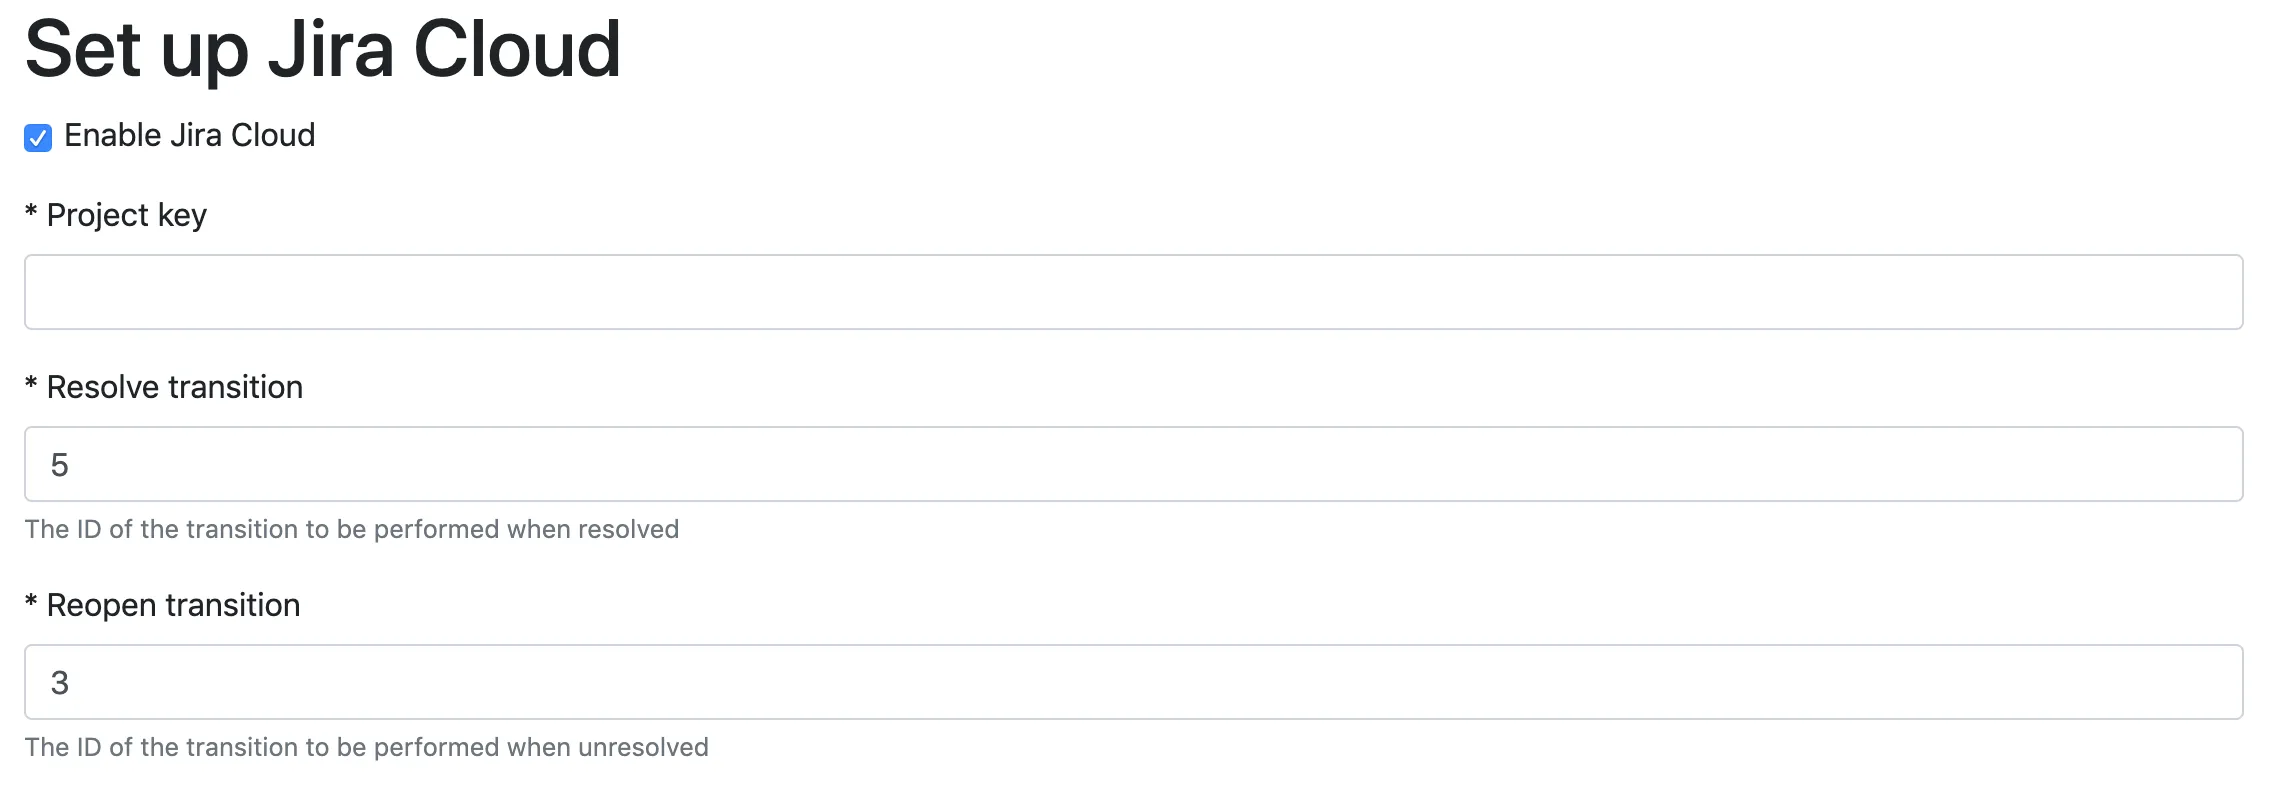
2. Configure
Section titled “2. Configure”Here’s an overview of the options:
- The project key was setup when you created the project. It can be found (on Jira) from Project Overview > Administration > Edit Project.
- The transition ID’s can be set in your workflows on Jira when viewed in text mode. ID’s are unique, so make sure there are no conflicting values.
- Send a detailed issue description controls how much fault data is included in new issues. By default, Honeybadger sends a short backtrace excerpt and a link back to the fault in Honeybadger. Enable this option to instead send a detailed Jira-wiki description that includes context, parameters, and the backtrace. Note that enabling this sends more potentially sensitive fault data to Jira.
3. Save
Section titled “3. Save”Click “Save” to be sent to Atlassian to authorize our Honeybadger App.
That’s it! Once we have an OAuth connection to your instance you can test the integration clicking “Test”.